Internal harddisk for EX5
This document is meant to help
everyone willing to install the internal harddisk for Yamaha EX5.
It's quite easy when you know
what you are doing, but you can damage EX5 and/or HD permanently
if you dont!!
Required before installation:
- ASIB1 SCSI interface.
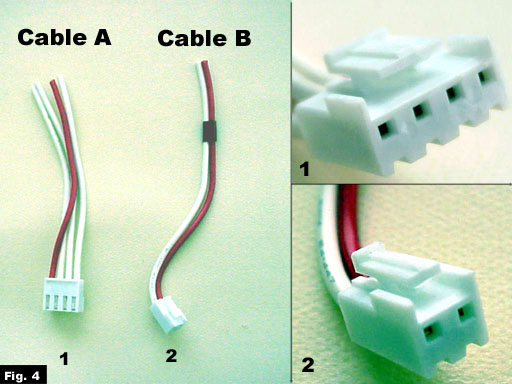
- Two power cables (named A and
B in this document) [included in ASIB1].
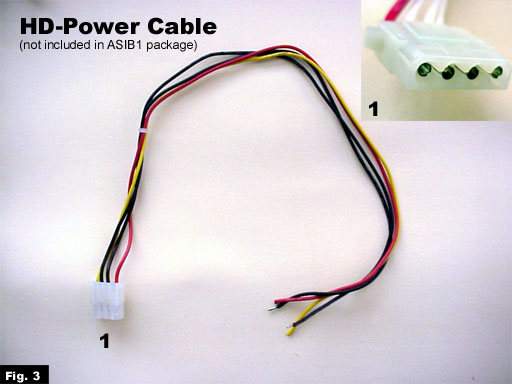
- Harddisk power cable [not included
in ASIB1].
- SCSI-cable (~70 cm).
- Harddisk (with proper SCSI termination).
- Frame for harddisk.
- Screws to install the frame.
(For additional info, please check Michael Gerber's document "Internal
harddisk for EX5R".)
1. Power cable
 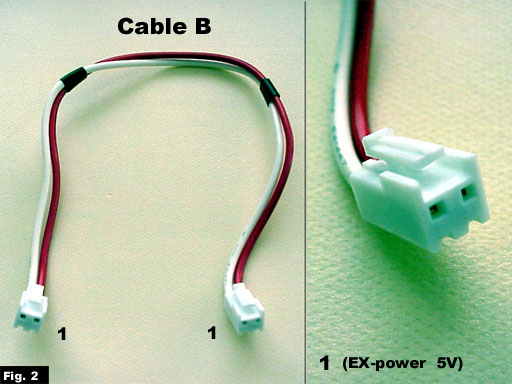 
  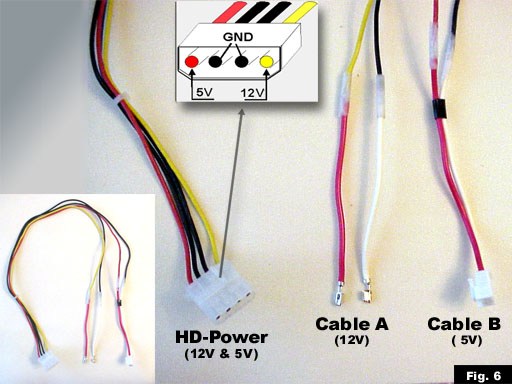
The power supply inside the
EX5 can provide both the reguired 12V & 5V. Unfortunately there
is no
existing power cable for harddisk,
so special cable have to be done to get the power for HD.
Figures 1-3 shows the
needed cabels.
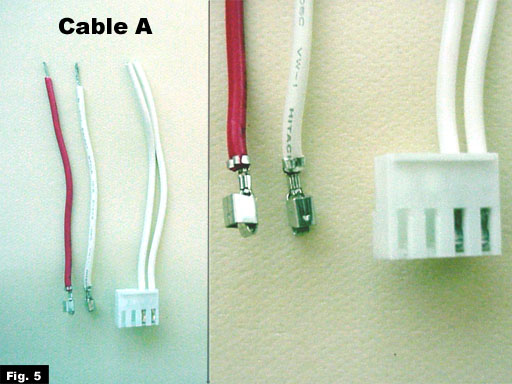
Figures 4-6 illustrates
how to connect those cables together.
2. Harddisk frame

Figure 7. Because there
is no any suitable stands or racks where to install the
HD but only a free space, a
harddisk frame is needed. The only requirements
are that it's small enough to
fit in its place and that there is possible to drill holes
where to get it connected to
the EX5.
3. Installing the harddisk
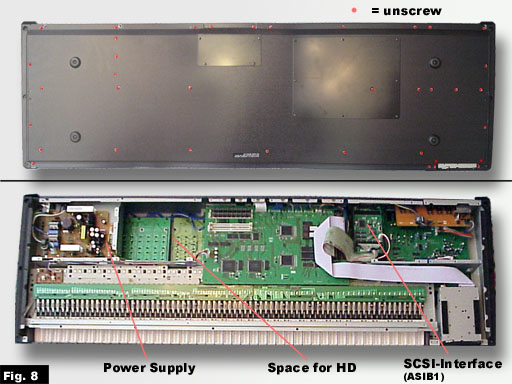
Figure 8. To open the
EX5 it's have to be turned over. When cover is removed
the power supply can be easily
located. From the side of it there is enough
room to install the harddisk.
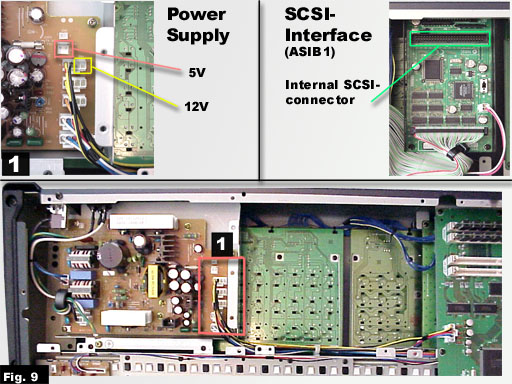
Figure 9 shows the connectors
in the power supply where to connect the
own power cable. It also shows
where to find the internal SCSI connector
(in ASIB1).
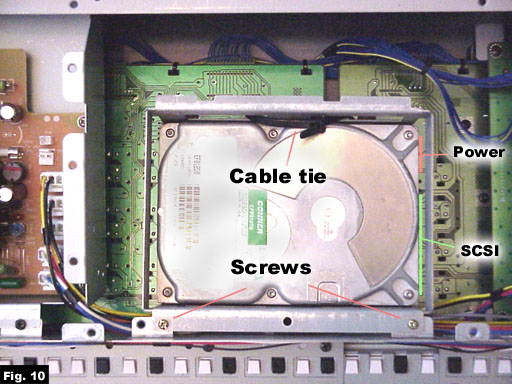
Figure 10 illustrates
the installation of HD-frame. HD-frame is screwed to it's
place in one side. Cable tie
is used in the other side.
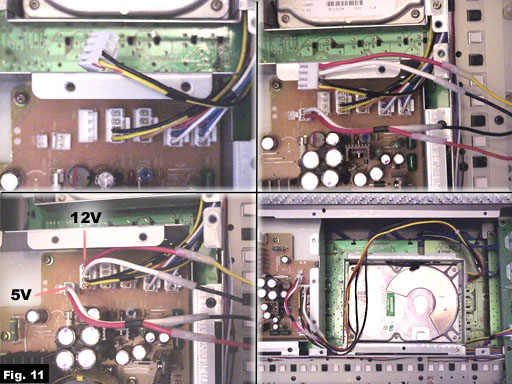
Figure 11. Before connecting
the own power cable one of the existing connectors
must be detached. There is only
two connected wires so using the other two that
are unconnected makes it possible
to get the needed 12V. For 5V there is a free
connector.
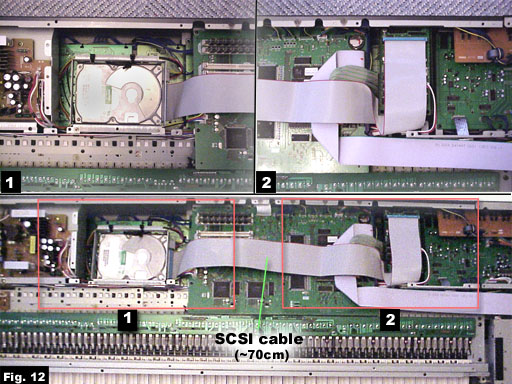
Figure 12. The
ASIB1 internal SCSI connector and HD are connected using
long SCSI cable.
4. Formatting the harddisk
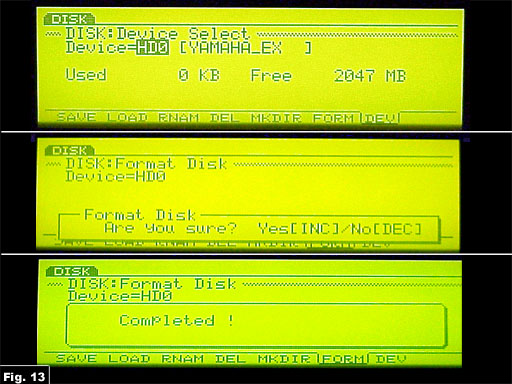
Figure 13. After selecting
the right device (HD0, if SCSI id 0) and formatting, the
harddisk is ready to use!!
(c) Juha Forsten, [28 Jun 1999]

|
